
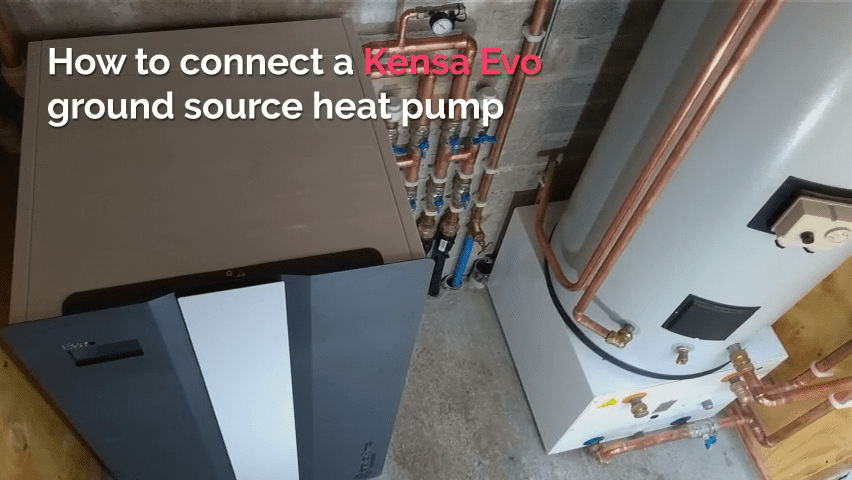
Kensa went on site with long-standing Partner Installer, Edward Savage of EPS Plumbing, Heating & Green Energy, to demonstrate the key points of an installation of a Kensa Evo ground source heat pump in a complete barn renovation in West Cornwall. Ed has undertaken all of the plumbing and heating throughout the build in addition to the installation of the Evo heat pump.
Ground side
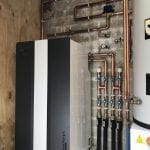 The Evo unit is located in a plant room adjacent to living areas; this is possible due to the latest advances in acoustic insulation and vibration mitigation minimising the Evo’s acoustic signature.
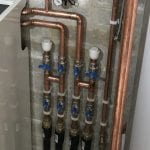
Insulated header pipe from two boreholes are connected to a manifold using compression joints. The boreholes are plumbed in reverse return to share equal flow rate between both arrays. Kensa also supply above and below ground manifolds for ease of installation; if any connections are made below ground they must be electro fusion welded.
As soon as the connections are made from the boreholes to the heat pump the system can then be pressure tested, filled and purged. In this installation the anti-freeze has yet to be added, after which the system will be filled and purged in accordance with MCS guidelines.
Simple push fit connections or any mechanical compression fitting of your choice can connect the ground side pipework to the back of the Evo. The conveniently placed connections allow installers to join the system to the Evo from the top, rear, and side for ease of unit installation and compatibility with any site set-up.
Load side
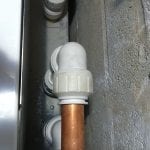
Push fit connections are also used to connect the Evo to the load side (in this case underfloor heating). Compression fittings can also be used, push fit being preferable for ease of installation and removal if necessary in the future.
A diverter valve diverts flow out of the Evo into a three port valve to allow flow into the coil in the tank or the underfloor heating. The diverter valve is controlled by the Evo, and comes supplied with the unit.
Ed has installed a buffer tank and connected this across the primary heating flow and return in a diagonal fashion for maximum thermal destratification inside the tank.
Pressurising the system
 The flexible hose can be used to connect the cold water mains supply to provide two separate fill loops: one for the load; one for the ground. Firstly it can fill and top up the load side of the system (underfloor). Secondly to top up the ground side, should it ever drop in pressure.
Separate fill and purge ports are located next to the incoming borehole pipes and shown here with the white cap ends. This is the point at which you would pump in your fresh water and then your anti-freeze. If using a subterranean or below ground manifold supplied by Kensa then these valves will be present.
Although the Evo’s touch-screen displays pressures and temperatures, as a recommended optional extra, Ed has added a pressurisation gauge on the ground side for quick observations.
An expansion vessel is installed to allow expansion on the distribution. The pressure can be viewed by the gauge on the combi valve. Again although the Evo touch-screen display has a pressure indication, for quick observations Kensa recommends the installation of a pressure gauge for convenience.
Control board
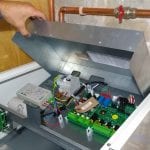 To remove the front panel of the Evo it is as easy as removing one screw.
Once the front panel of the Evo has been removed the top panel can then also be detached to access the control board. The Evo’s control board and touch-screen display comprise the ‘Genesis System Manager’, the world’s first system manager dedicated to ground source heat pumps, exclusive to Kensa, and launched with the Evo Series.
To gain access to the Evo’s control board two screws are removed.
Within the Evo’s control board can be viewed the on-board power meter which records the power consumption used by the unit (no control wires or power have been brought into the Evo at Ed’s installation as the building hasn’t yet progressed to this stage).
The Evo has a special feature “function tests” button which enables all of the controls to be tested by pushing buttons on the touch screen display enabling you to turn on pumps, valves, supplementary heating etc., a really useful feature. It also comes with a link wire, so you can run and test the unit before all of your secondary wiring connections are completed.
Once connected the Evo’s control board can enable two heating set points, as well as the facility to control additional underfloor pumps if necessary, up to 2 amps. It also has a supplementary heating control and can also control an immersion to combat legionella. Amongst many other benefits the Evo has the option of using a weather compensation system.
Commissioning
 Once connected the Evo is ready for commissioning. Thanks to the Evo’s intuitive Genesis System Manager installers can easily follow the commissioning process and set the unit to run. The step-by-step commissioning is usually carried out by the installer over the phone with Kensa and recorded on Kensa’s system, however the Evo is password protected for the installers benefit and can be commissioned easily by the installer alone.
The Evo’s control panel displays real-time CoP’s, ground and load side pressures and temperatures, and system mode. The imminent introduction of wi-fi connectivity to the Evo’s control board will allow remote control of the unit.
For more information on the Kensa Evo ground source heat pump visit www.kensaheatpumps.com/evo or for further details on this featured installation contact Edward Savage at epsplumbing@icloud.com .
Watch the installation in pictures
